Wednesday, June 27, 2012

My Almost Famous Stove!


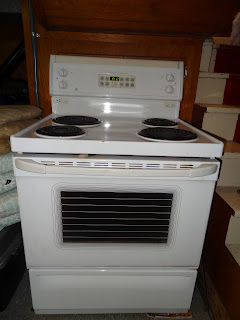
You know, it's strange but over the years I seem to have acquired a stove collection!  I have the one above which I will be discussing in a moment but I also have this stove.


The stove at the top replaced this stove in our kitchen.  Unfortunately, the oven was too small for my liking so Mr. P. and I decided to move this stove into our laundry room in the basement.  This stove is only used when I have something too big to fit into the stove upstairs.

But these aren't the only stoves I have.  I also have this stove.


This one came with the house.  It was so heavy that the previous owners decided not to move it.  That was OK with me because I love having this stove in the basement.  It is also in the laundry room.  You'll notice that there is a lid over the back left burner.  This is actually a whole pot that sits over a burner that is sunken into the stove so that you can see to stir your soup or whatever you are cooking the the pot.

I love this stove because is has a warming drawer and an oven and both have come in very handy when we host large dinner parties!


Now back to the top stove.  I have wanted a stove just like that since we first moved into our 1902 Victorian home but it was way out of our price range.


This is a reproduction of a late 1800's wood stove and has 6 gas burners on top along with a rather small electric oven.  The drawer under the oven simply holds a few frying pans and the rest is pretty much decorative.

When we bought the stove we had to enlarge the recess in the wall where the old stove sat.  We were extremely lucky that we were able to do so without damaging the wall in the dining room on the other side.  We tiled the wall with a basic subway tile and when we were through we had a mere fraction of an inch in wiggle room to make it fit.

But the real story is how we got this stove.  I had given up finding a stove like this and was trying to find a 1930's stove and we could have restored.  One Saturday morning I decided to type in the words, "old stove" onto Kijiji and see what came up.  A picture of this stove had only been posted a few minutes earlier in Toronto (about a 2 1/2 hours drive from where I live) and for only $800.00.  Let's just say that Mr. P. never dialed a number so fast!  Before we knew it we were on our way to Toronto to pick it up.

When we arrived at the address we found a lovely, run-down Victorian semi that was being completely renovated by a young couple.  It sat on a narrow street in Toronto (one of the most narrow streets I had ever seen!).  We purchased the stove and were loading it in the truck when the man who sold it to us mentioned that it had recently been used in a movie.  In fact, the entire house had been a set for a Sarah Polley movie that had been shot in the summer of 2010; we bought the stove that November.

The movie is called Take This Waltz and stars Michelle Williams and Seth Rogan.  Seth plays a chef in the movie who is writing a cookbook. We were told that when Sarah Polley saw the stove, she insisted that it had to stay.


Check out the trailer above.  This is the same Victorian where we bought the stove and the same kitchen , although the cabinets had been repainted white instead of green.  Hopefully, my stove does not end up on the cutting room floor because it's the closest I'll ever be to being famous!  The movie comes out this Friday so check it out if you have a chance.  Maybe you'll even see my stove!


Monday, June 25, 2012

Another Helpful Laundry Tip!


Not everything that goes through the wash can go directly into the dryer.  However, many of us do not have so many delicates that we can wait until we have a whole load.  This means that we have to remember what is in the wash that needs to be hung and what can go into the dryer.  This becomes even harder if someone else in the family decides to put the load from wash into the dryer.  I know that I have had more that one sweater that has shrunk from this!

So here's a tip that I picked up from Pinterest.  Take a white board marker and write on the washing machine what cannot go into the dryer.


I keep a white board marker and some paper towels next to the washing machine.


Now I don't have to worry.  Not only can I remember what is in the wash but now anybody can do a load of laundry without having to worry that they put some sort of delicate into the dryer.


Friday, June 22, 2012

Laundry Detergent


This is how I feel about laundry!  I find it to be the worst chore in the house.  However, I love the smell of fresh, clean laundry.  Did you know they even have candles that smell like clean laundry?  I'm thinking I need to get one and just forget about laundry!  Then again, maybe not.

I wanted to share with you a tip I found on the Internet recently to help with your laundry.  I wish that I could remember where I found it so that I could give credit where credit is due.

I have a front-load washer and this is what my laundry detergent usually looks like.


There was always some left in the little cup and if you look at the top of the detergent container you can see where I set the cup because it is gooey from little dribbles of soap.  It didn't matter how hard I tried there was always soap residue left wherever I sat the cup down.  Even if I used a smaller bottle of detergent it would always dribble down the side and I was left with the same mess.

Now look at this.


It is not what it looks like.  I saved my empty dish detergent bottles and I filled them with my laundry detergent.  Since my front-load washer already has a line showing me how much detergent to put in, I don't need a small cup to measure it out.  I simply pour in some detergent and nothing drips!


I also don't have to lug those heavy bottles any more.  I think this is a great idea for someone with Arthritis in their hands or someone who no longer has the upper body strength to lift those heavy detergent bottles.

I love this idea and it has been working really well for me!  And best of all, no more soapy residue!

Thursday, June 21, 2012

Silencing Your Inner Critic


I am fortunate to be friends with an amazing local artist named Ana.  Ana takes her art seriously and recently was part of a group of artists that committed to drawing one thing a day as dictated by the leader of the group.  I had been enjoying seeing Ana’s artwork each day on Facebook until it came to the day that Ana was instructed to draw her “inner critic”. 

This is what Ana's inner critic looked like.


Ana admitted that she doesn’t go to this dark place often but, nevertheless, it’s still there in the recesses of her mind.  


However, what happened next was amazing!  Ana’s friends were genuinely offended by the words spoken by her inner critic.  They stood up for her as though they were defending her from a bully.  How dare that “inner critic” say that about our friend Ana!  She is nothing like that!  The picture truly struck a chord with the people that she shared it with.

This is what Ana had to say the next day.  “I think most of us have similar feelings, perhaps not as vividly as I illustrated, but they are in us. I think that is why people were so uncomfortable with my images, especially the inner critic -- it touched a raw nerve with many people.”

I agree completely!  We all have our inner critic; that little voice in our heads that says that we are stupid or ugly or not good enough.  It is a bully that constantly beats us down, if we let it.  We need to recognize that this type of self-talk is destructive and can keep us from achieving our dreams. 

The next day Ana posted a very different picture; her inner cheerleader.


I like this one much more than her inner critic because it is a much better representation of the Ana that I know.

In most cases though, we are our own worst critics.  No one would ever dream of saying to us the things that we say to ourselves in our heads.  And the sad fact is that this kind of self-talk will only make us feel bad about ourselves. 

Start to be aware of the negative voices in your head.  You would not allow another person to speak to you like that so don’t allow yourself either.  Each time you think something negative about yourself counter it with a word or two from your inner cheerleader.  Pretty soon you may find that you’re hearing from your cheerleader much more than your critic.  Celebrate who you are; flaws and all!  Nobody is perfect.

I want to say a special thank you to Ana for allowing me to share this story with you.  For me, it very vividly showed how out of tune our inner critic can be with what our friends and family see.  Like I said at the beginning of the post, Ana is a very talented artist and if you are interested in seeing more of her work please check out her amazing site here.  


Wednesday, June 20, 2012

BBQ Clean Up


This is my BBQ.  There's nothing special about it, it's just a standard gas BBQ and it was in desperate need of a good scrubbing.  I spent Saturday afternoon cleaning it.  I sprayed the grills with Easy Off Oven Cleaner and I also sprayed the entire outside with Easy Off.  Oven cleaner really makes cleaning the grill much easier.

I do have a couple more tips for making your BBQ seem like new.  Once you have the whole thing clean you can bring some life back to the metal by rubbing it all over with baby oil.  It will make your BBQ shine like new!

We grill in all kinds of weather and quite often when just when we have finished grilling it starts to rain (sometimes even before we're finished!).  In fact, this happened while preparing our Father's Day feast on Sunday! The BBQ is still too hot to put the cover on and so it's left to sit out in the rain.  In order to protect the surface I rubbed some Rain-X all over the exterior of the BBQ.  Rain-X repels rain, sleet and snow on the exterior of a car's windshield.


I figured that if it worked to provide a protective shield on car windows than why not on a BBQ!  It's not easy to see in the picture but the water beads up.  

This particular bottle of Rain-X was purchased to rub onto the inside of a glass shower door.  It keeps away hard water stains and soap scum.  However, if you choose to use this indoors be sure that your room is very well ventilated!  Open a window, use a fan and a mask!  This stuff is very potent but it works!

Do you enjoy grilling outside?  Do you have any tips for keeping the grill clean?

Monday, June 18, 2012

A Father's Day Feast

Normally I post about decluttering and organizing on this blog and I have done plenty of things in the past few months that I can blog about.  However, I was hesitant to share them all too soon for fear of running out of ideas.  I was looking through my photos though and I discovered that it will be a while before I run out of ideas for blog posts!

However, I've decided that I am going to throw an occasional recipe in the mix.  Since this blog is about "home solutions" and the kitchen is the heart of the home, I felt that I could combine my two loves, cooking and organizing, into one blog.  This will continue to mainly be an organizing blog but sometimes a recipe is just too good not to share!


Today I would like to share with you our Father's Day feast.  I few days ago I asked Mr. P. what he would like me to make for him for Father's Day dinner.  He declared that he would like steak.  This is my recipe for a very flavourful steak and one that my family really enjoys.

Marinade


1/3 cup of Worcestershire sauce
3 tbsp. honey Dijon mustard
1 large clove of garlic pressed
2 sprigs of fresh rosemary finely chopped


I got this Rosemary from a container on my back deck.  You don't get any fresher than that!  This is what the marinade looks like.


Put your steaks in a Ziplock bag and pour the marinade over.  It doesn't matter what kind of steak you use and this will actually work well with a cheaper cut of meat because the marinade will tenderize the steak.  We used Prime Rib steaks but only because we buy our beef directly from the farmer and pay the same for Prime Rib as we do for hamburger.  Buying Prime Rib in the grocery store is way out of my budget!


Place your steaks in the fridge and marinate overnight.  The next day you simply pull them out and toss them on a screaming hot grill.  I now use a method that I learned from Jamie Oliver for cooking steaks.


Have you every noticed that, as you are cooking one side of a steak, all the juices seem to bubble to the top?  Then when you turn the steak over all that juice runs into the flames.  Those juices should be inside your steak and not at the bottom of your grill.  Jamie Oliver suggests turning your steak every minute before the juices have a chance to bubble up.  We now do this with all our steaks and they are always very moist and tender.


I served this up with a corn salad and some simple sauteed mushrooms.  It would have been lovely with a nice baked potato but since Mr. P. is diabetic, we now skip the potato.

Try this recipe with a beef roast too.  Marinate your beef roast overnight in the fridge.  Put you roast into an uncovered roasting pan and put into a 400 degree oven.  Baste with the leftover marinade every 20 minutes until the roast is around a half hour from being done the way that you like.  Don't worry about boiling the marinade because you won't be using it near the end of the cooking stage.  Once the roast is a half hour from being done, lightly drizzle it with honey.  I know it sounds strange but when you put it back into the oven a beautiful dark crust will form and it is truly the best part of the roast.  It will look a little burned but trust me it will be delicious!

I hope everyone enjoyed their Father's Day as much as we did!

Friday, June 15, 2012

Fifteen on the Fifteenth


I can't believe it's the fifteenth again already!  Have you spent 15 minutes on your taxes today?

Last month I asked you to designate a place that you would keep all of your tax papers.  Did you have any charitable donations that you received a receipt for?  Or did you have some medical expenses that could be written off?  Today is the day to make sure that all of these receipts are filed in the right place so that you can find them come tax time next year.

Have you filed last year's return yet?  I keep mine in a file folder that I keep in my filing cabinet.  I put last year's return in the back and take out and shred the one in the front.  I do not keep my return with all of my receipts simply because we run a business out of our home and we fill a banker's box each year with all of our receipts.  At times the bank requires our returns but they never require all the receipts so it is handier to keep them separate.

If you are unsure about how long to keep certain tax papers, here is a good link explaining it.

Wednesday, June 13, 2012

The Perfect Storage Container


This is what I discovered yesterday.  I asked my youngest P why there was a Nerf basketball inside my crystal candy dish.


He informed me that he shopped inside the house to find the perfect storage container to hold his ball.  It was an exact fit.  I love the fact that he finally seems to be learning from me.  However, I don't think I mentioned that the crystal candy dish is the centre piece on my dining room table!


Monday, June 11, 2012

Organizing the Car


Yesterday, my friend Linda emailed me this photo.  Someone was ingenious enough to use a plastic cereal container as a garbage pail in their vehicle!  I absolutely love this and it gave me the idea to show you what Mr. P. and I did for our oldest P.

As I mentioned in my last blog post, my eldest P recently turned 21 years old.  A few months ago he bought himself his first vehicle.


It's much better than my first vehicle which I'm pretty sure looked more like this.


OK, maybe I'm exaggerating a little, but not much!

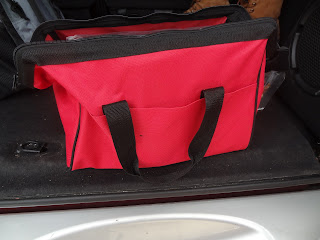
Being the worrisome Mama that I am, I decided to get the eldest P some much needed accessories for his new ride.  I picked up a deluxe, road-side safety kit that includes a first kit, a cone, a shovel, a blanket, hand warmers, gloves, jumper cables and so much more.


It all fit into this neat carrying case that stores easily in the back of the vehicle.  But that wasn't enough for this uptight mother!  


I also picked up this back seat organizer and a few things to go in it.


There's some Kleenex, some sanitizer wipes, trail mix and emergency instructions should anything ever happen.  One sheet has all of his contact information should, heaven forbid, he not be able to communicate.  There is another sheet entitled, "What To Do If Caught In a Snowstorm" and one entitled, "What To Do If Stuck In The Snow".  There is a final sheet that has a maintenance log so that he can keep track of when he has the oil changed, tires rotated or any other repair that needs to be done.

Not the most exciting birthday gift ever but at least I know that he has the tools he needs to stay safe on the roads.

A special thanks to Linda for sending me the top photo.  I had not even thought about blogging about organizing the car until I saw that.  Now I have to run out and buy a couple of plastic cereal containers!

Is there anything that you keep in your car in case of an emergency?  Just remember to keep everything contained in one spot so that you do not have any UFOs (untethered flying objects) should you need to slam on the breaks.  Sometimes they can cause more damage than the accident itself.

Thursday, June 7, 2012

Organizing the Lower Cabinets


I know that it has been a while since I last did a blog post.  Things have been very busy around here lately.  My youngest P had his senior prom this past weekend and it was also my oldest P's 21st birthday.  We are also having some plumbing work done this week and I had to spend time in the basement cleaning up so that the guys can install some new pipes.  I've made sure to take lots of photos and it will be coming up in a blog post soon.

A few weeks ago I finally finished up my kitchen cupboards.  You can see the progress I made earlier here  and here.  Now I have finished up the lower cabinets.

This is our cereal cupboard.

Before

After
There's not a huge difference in this cabinet but I did take everything out and sand and paint the interior.  In fact, I painted the interior of all the cupboards that I am showing you today.

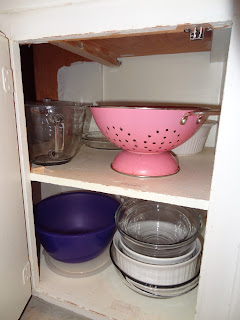
Next is the cupboard that holds all my bowls.

Before

After

I installed this handy slide-out tray that holds all my glass bowls and I got rid of the ugly pink colander.  I now have a new plastic one that sits on the top shelf but at the time of the photo I hadn't picked it up yet.

Now for the pot cupboard.

Before
As you can see, all of my glass bakeware were in a plastic container on the bottom.  It was supposed to be easy to slide out but it ended up being too heavy.  The pot lids were also stored in a plastic container.  It contained them but it was still hard to find the right lid.

After

I am loving the wire, pull-out tray on the bottom and the pull-out lid holder is great.  I added some shelf paper and the whole thing looks so much nicer.

Now for the best part, under the kitchen sink!

Before

Everything was simply crammed under there.  I emptied it out, took out the linoleum that was on the floor of the cupboard, painted and added some shelf paper.

In Progress

I then picked up this under-the-sink organizer.


What I wanted in that space was a slide-out tray like what was in the pot cabinet but mounted on the side wall with a small tray up higher.  Unfortunately, I didn't find one until two weeks after we finished this project.  What we didn't realize with this particular under-the-sink shelf is that, in the picture on the front, the drain line goes into the wall whereas our drain line goes directly down through the floor of the cabinet.  There was no way to simply slide the finished shelf into the cupboard.  Luckily Mr. P. is extremely handy and was able to build the shelf in place inside the cabinet.

After
I used a candy jar to hold all of my dishwasher detergent.  This way it won't get damp sitting in the box on the floor and I also used a smaller one to hold all of my SOS pads.  I was able to use some more of the vertical space than before and everything is visible.  

I have a lot more organizing projects on the go and I am looking forward to sharing them with you.  Do you have any kitchen organizing tips to share?